Step-by-Step Guide
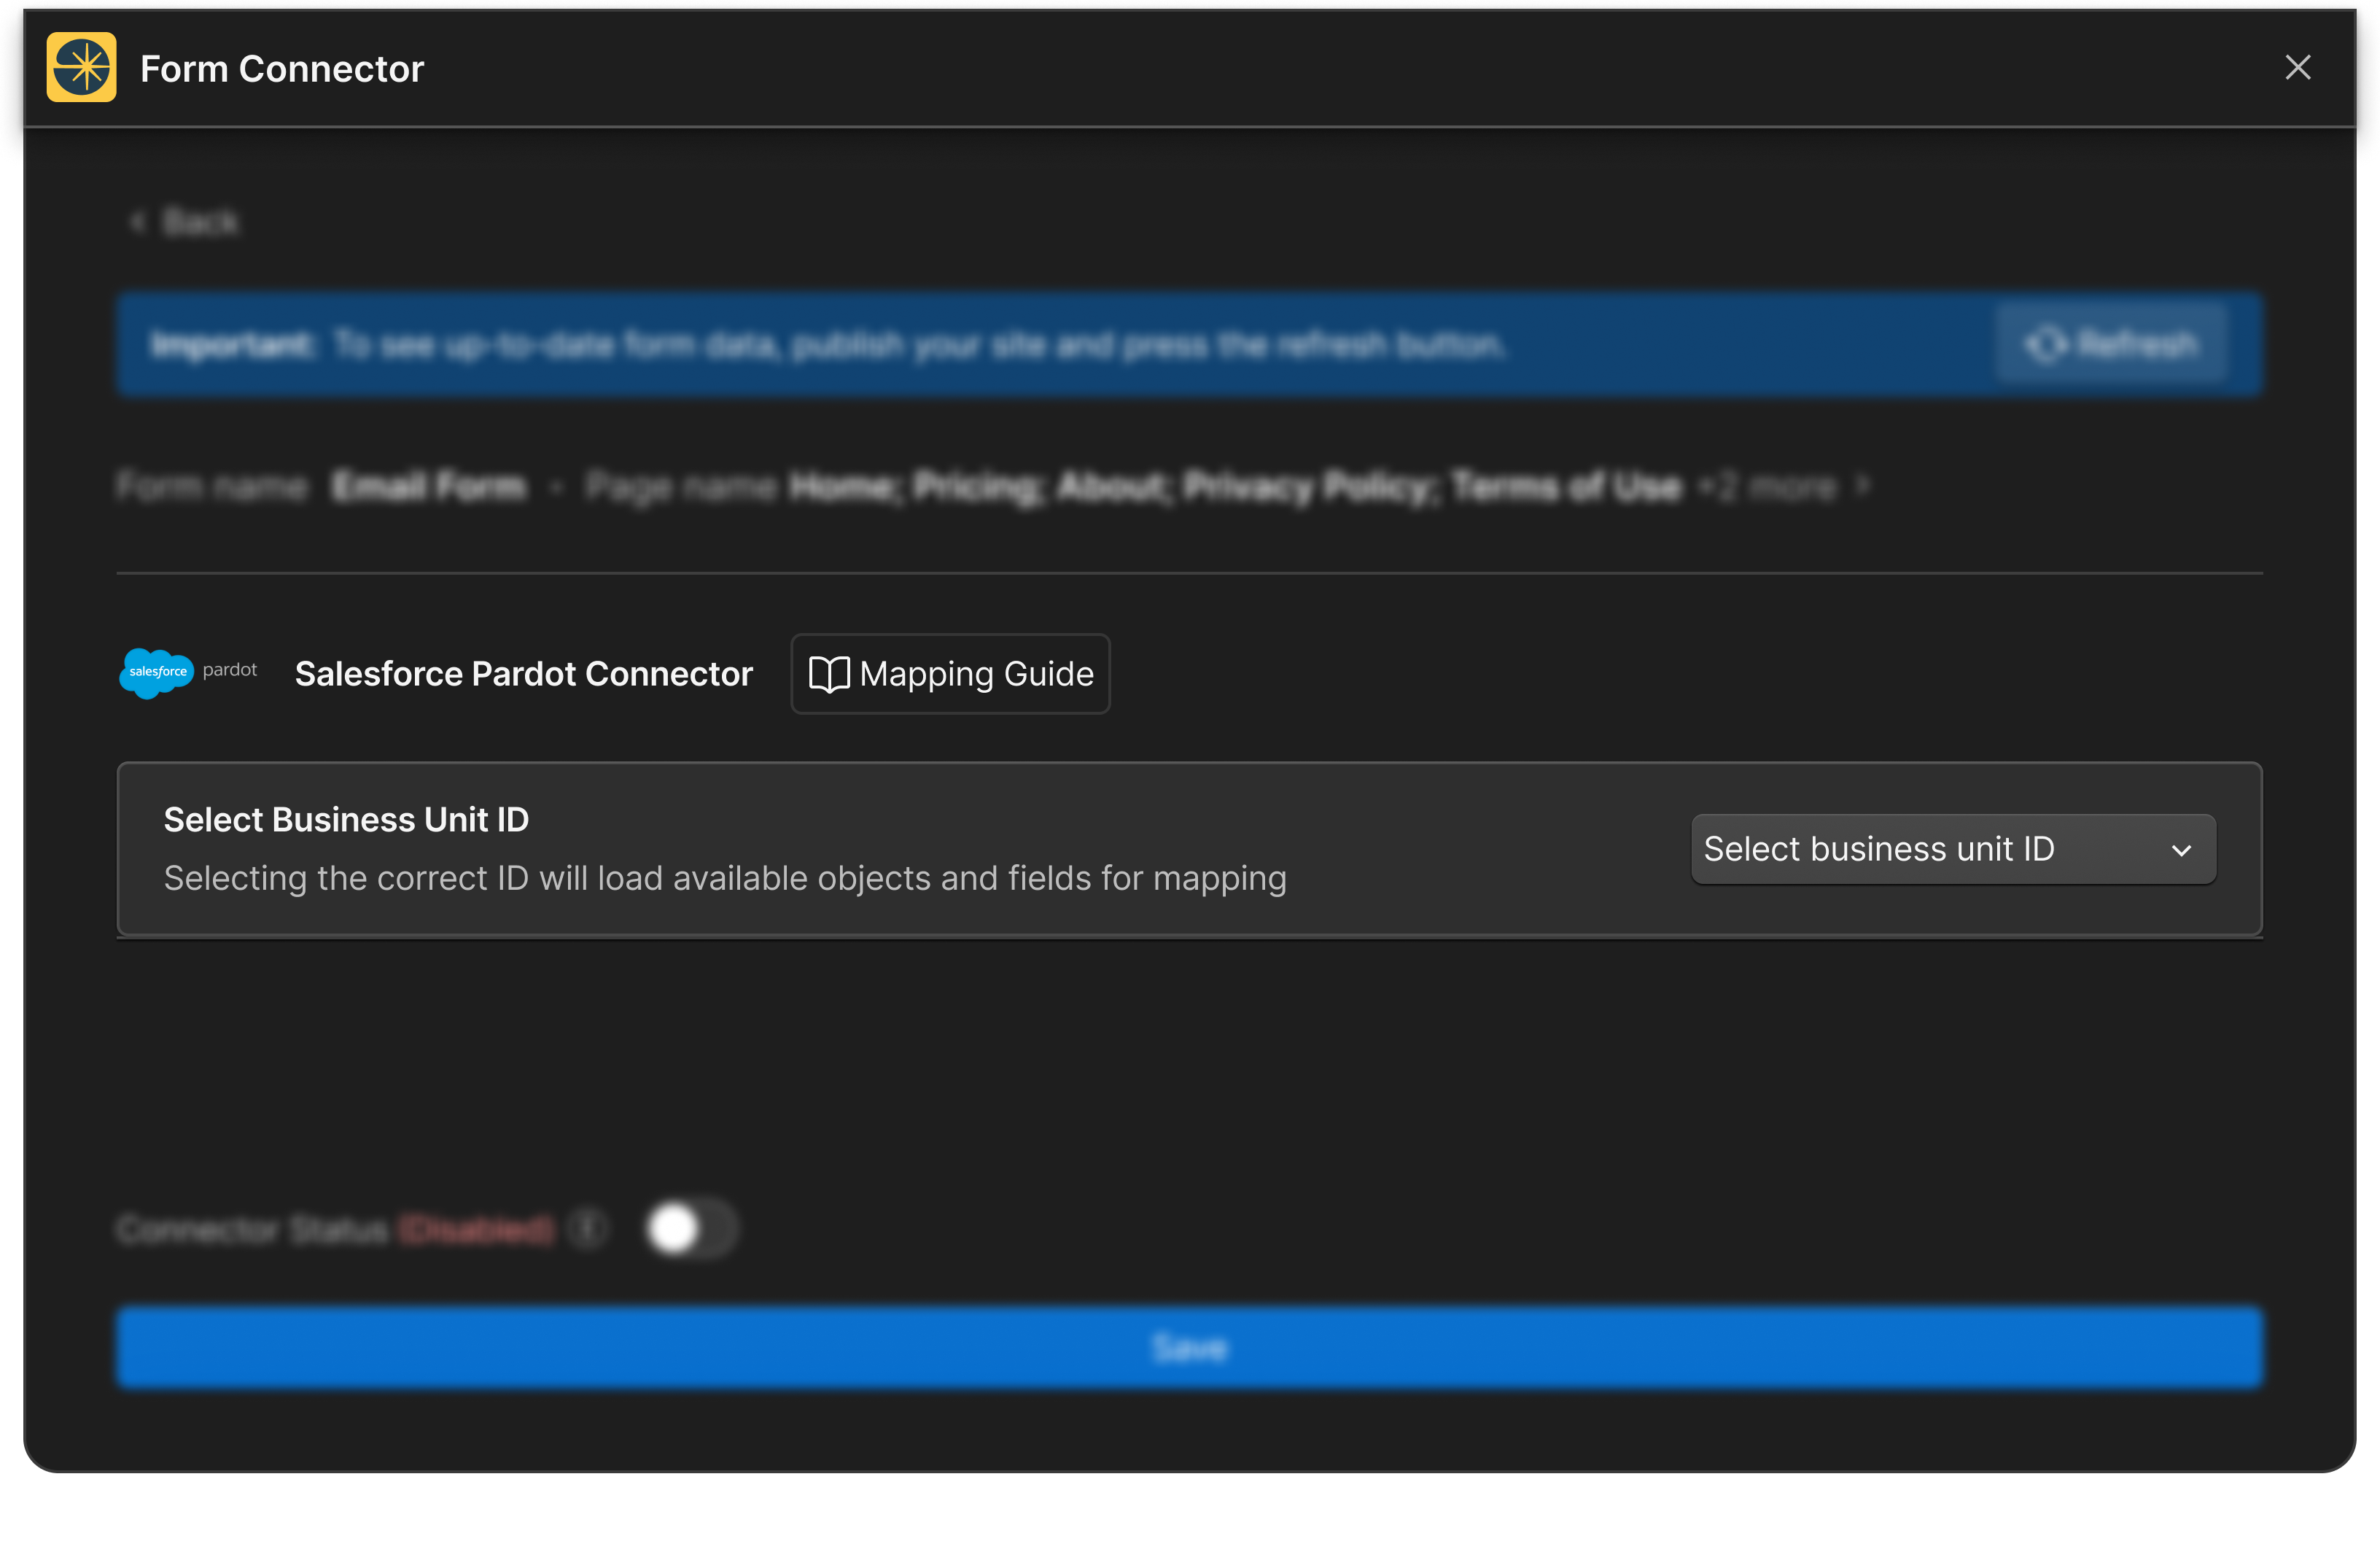
1. Select Pardot Business Unit ID
Start by selecting the Business Unit ID from your Pardot account.
- This step ensures the correct unit is associated, allowing the relevant objects and fields to load for mapping.
- If your Business Unit ID list is not up-to-date, click the “Refresh” button to reload it.
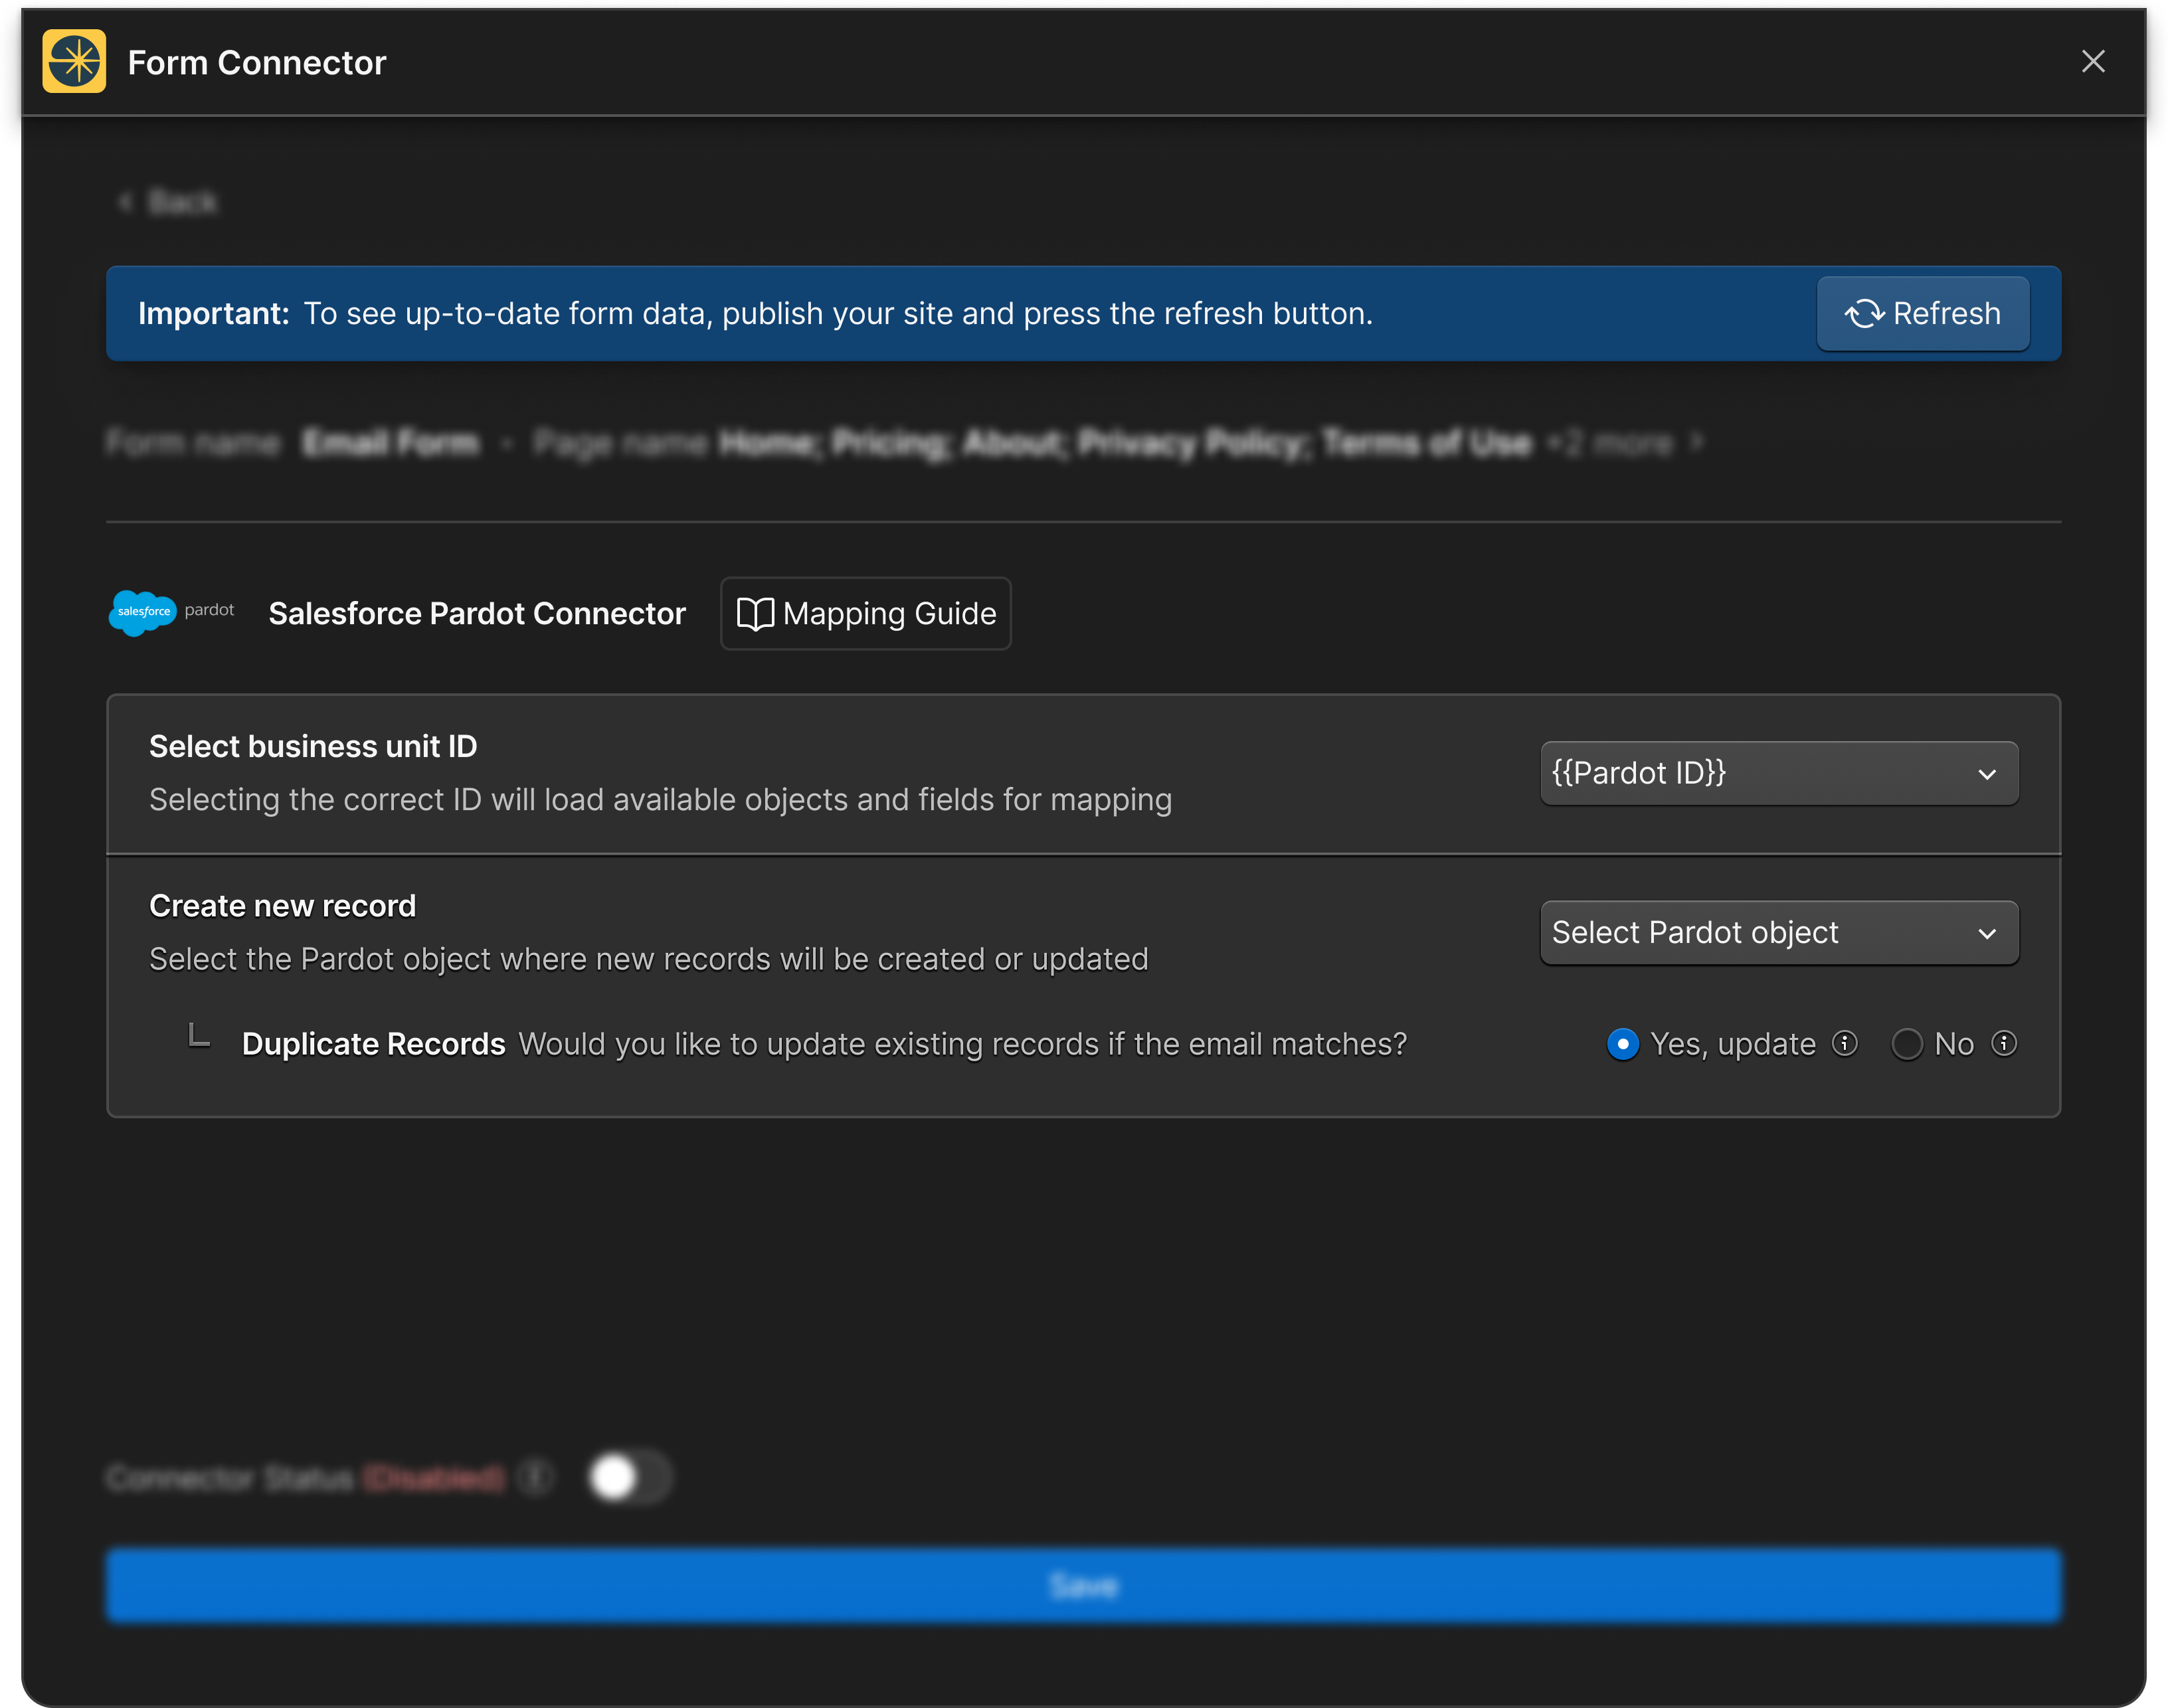
2. Select Pardot Object
Choose the Pardot Object where new records will be created or updated.
-
Examples include Prospects, Leads, or other supported objects.
-
The selected object determines where the form submission data will be sent in Pardot.
3. Configure Duplicate Handling
Decide how to handle duplicate records for submissions by selecting an option:
-
Always Create New Prospects: Every submission will create a new record.
-
Update Existing Prospects: If the submitted email matches an existing record in Pardot, it will update the record instead of creating a new one.
Use the radio button to make your selection.
.png)
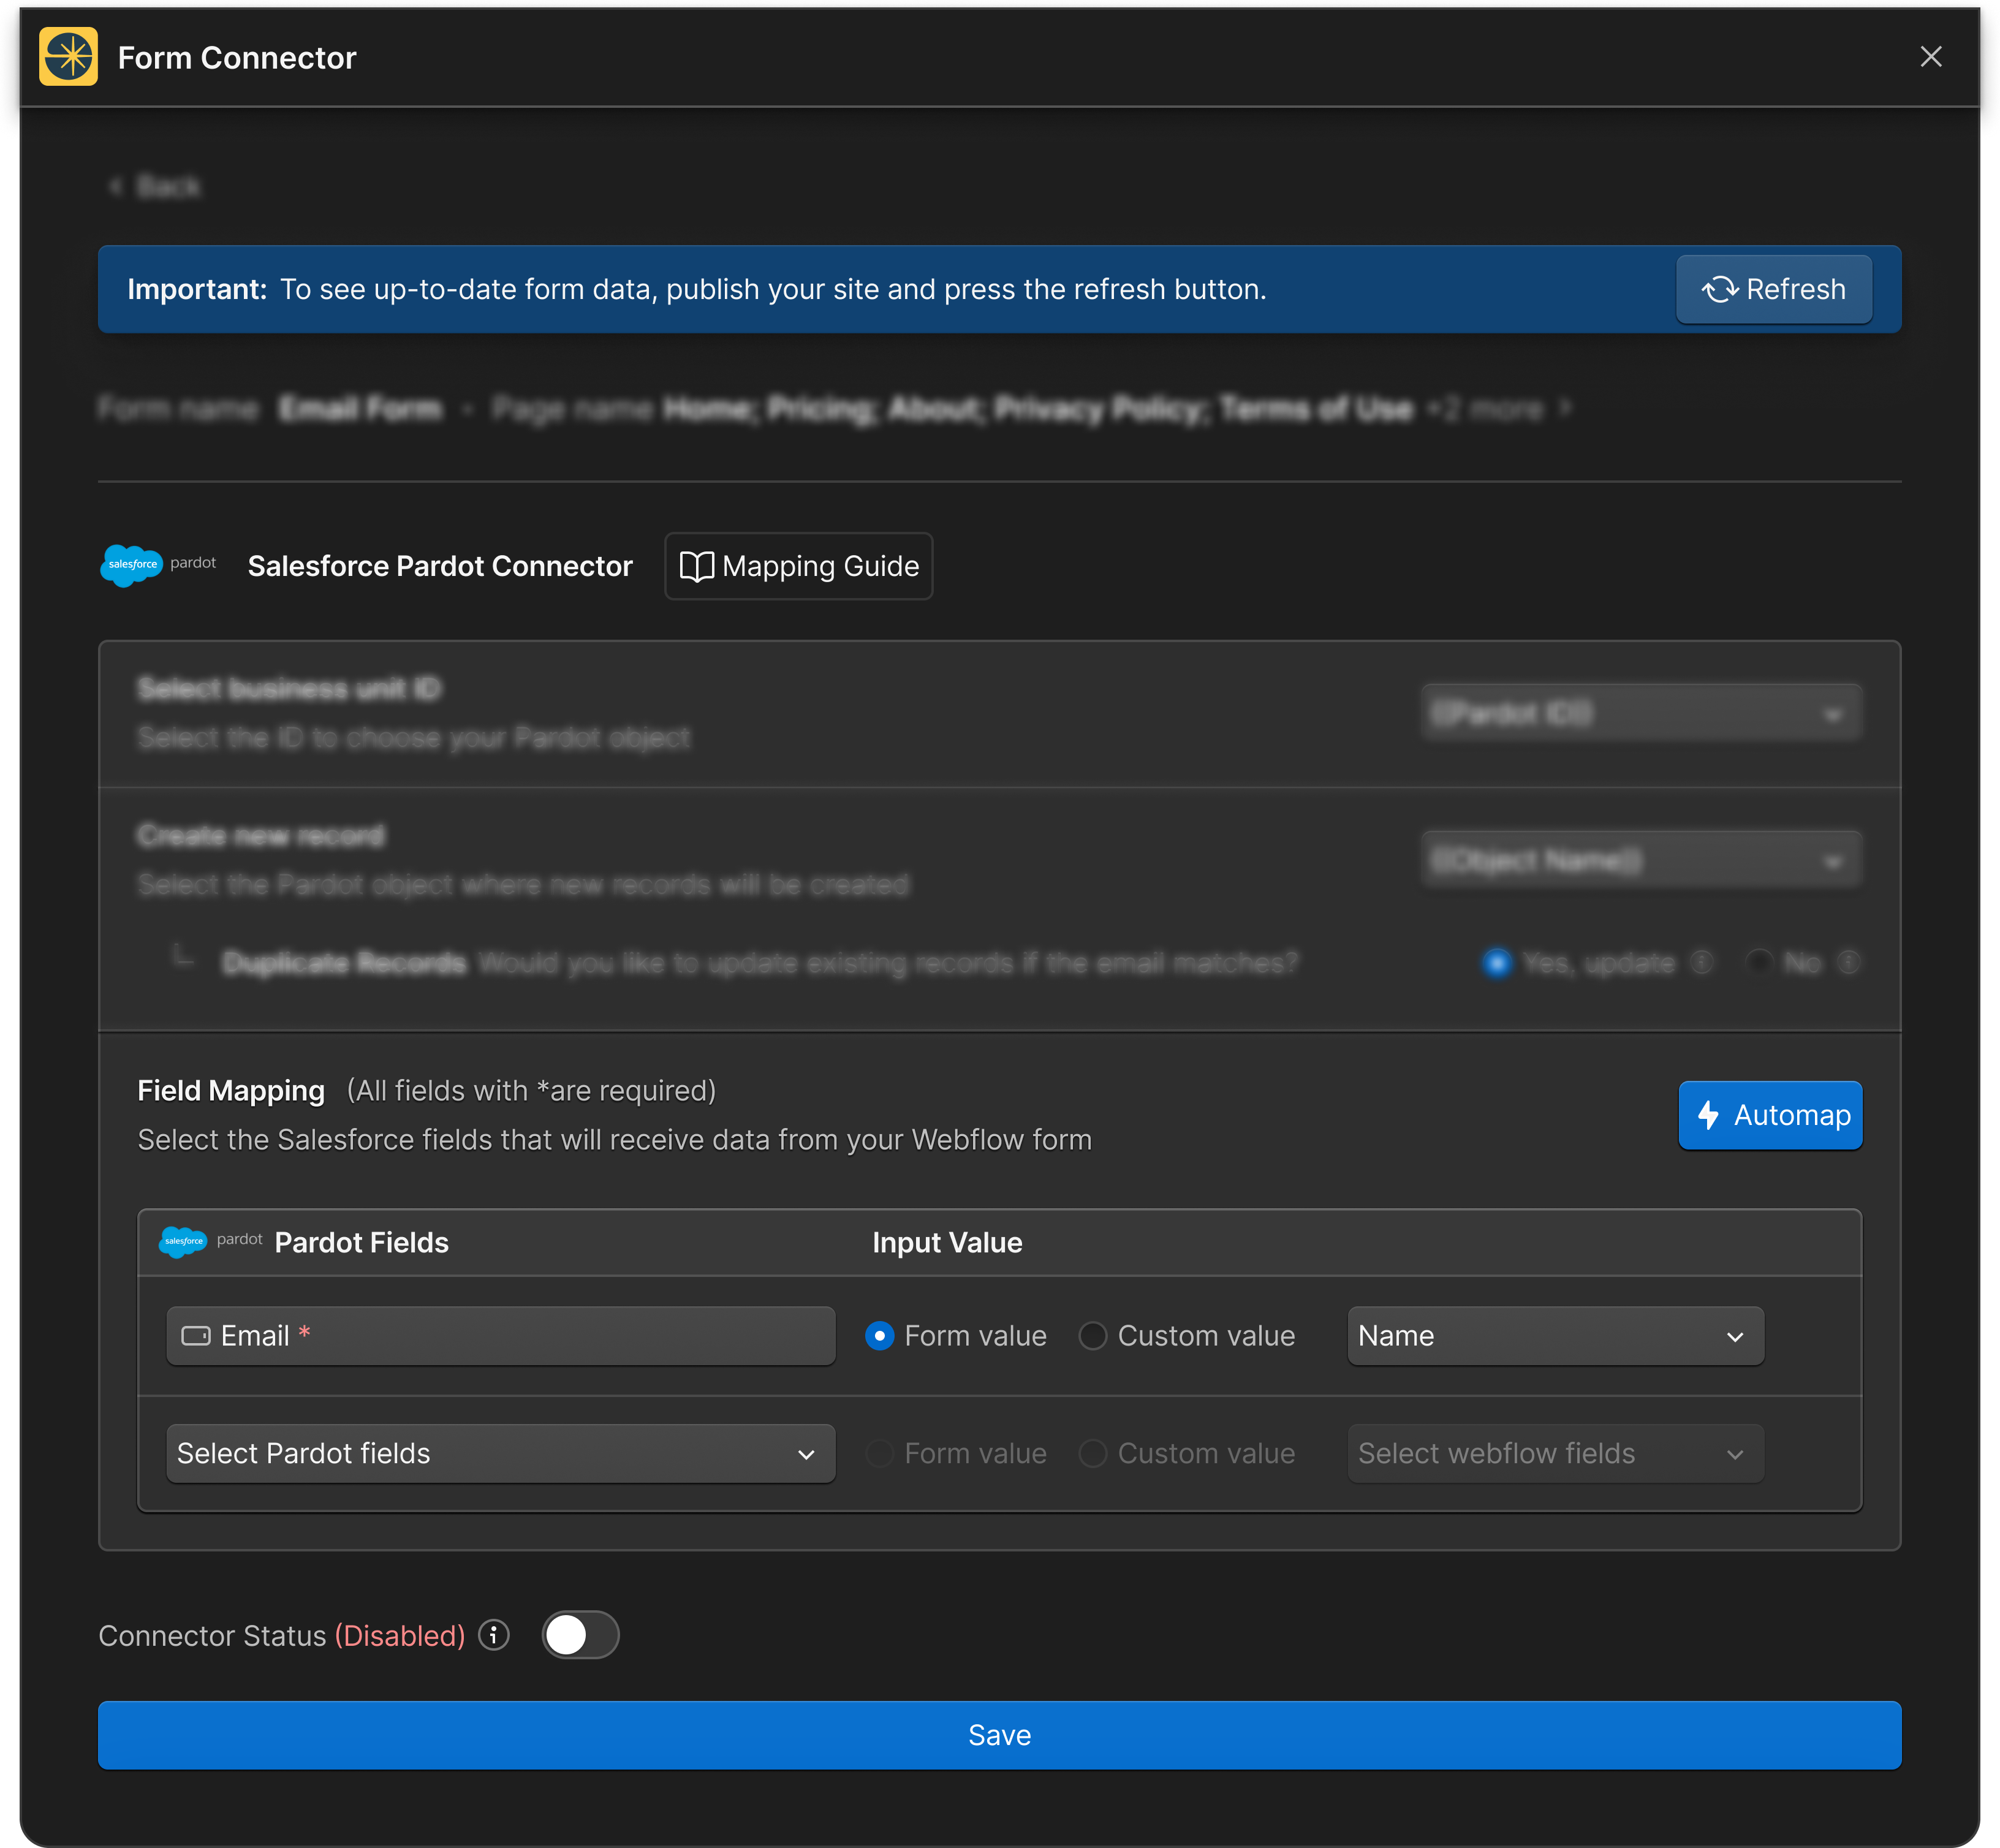
4. Map Pardot Fields to Webflow Fields
In the Field Mapping section:
-
You’ll see a list of Pardot fields that need to be mapped to Webflow form fields.
-
Fields required by Pardot (e.g., Email for Prospects) are marked with an asterisk (*).
-
For each Pardot field, you can:
-
Select a field from your Webflow form.
-
Set a default number or text value.
-
.png)
Automap Option:
Click the Automap button to automatically map fields with matching names in Pardot and Webflow. (Note: Field names must match exactly for automapping to work.)

5. Connector Status
Toggle the Connector Status to enable the connection, or save mapping as draft.
- Make sure to enable the connector once all fields are mapped correctly.
6. Save Configuration
After mapping all necessary fields and enabling the connector, click “Save” to apply your settings.
.png)
Key Points to Remember
- Business Unit ID Selection: Ensure you select the correct business unit to load the appropriate objects and fields for mapping.
- Object Selection: Choose the Pardot object that aligns with your form data and submission workflow.
- Field Mapping: Proper mapping ensures data accuracy and seamless integration between Webflow forms and Pardot.
Troubleshooting Tips
- Field Mapping Errors: Ensure all required fields (marked with *) are mapped. If not, you will see a red error message.
- Automap Issues: Verify that field names in Webflow and Pardot match exactly for automapping to work.
- Connector Issues: Ensure the connector status is enabled for data transfer to occur.
- Duplicate Record Issues: Review your duplicate handling settings if submissions are not processed as expected.
By following these steps, you can efficiently map your Webflow form fields to Pardot, ensuring seamless data integration and improving your workflow.