Mapping new Webflow forms to your software destinations with Form Connector App is very easy, straightforward and efficient. This guide will walk you through each step to ensure you rock this process!
Before starting to read. Do you want to see a mapping guide just for your selected destination?
Step 1: Choose the Page and select your form
-
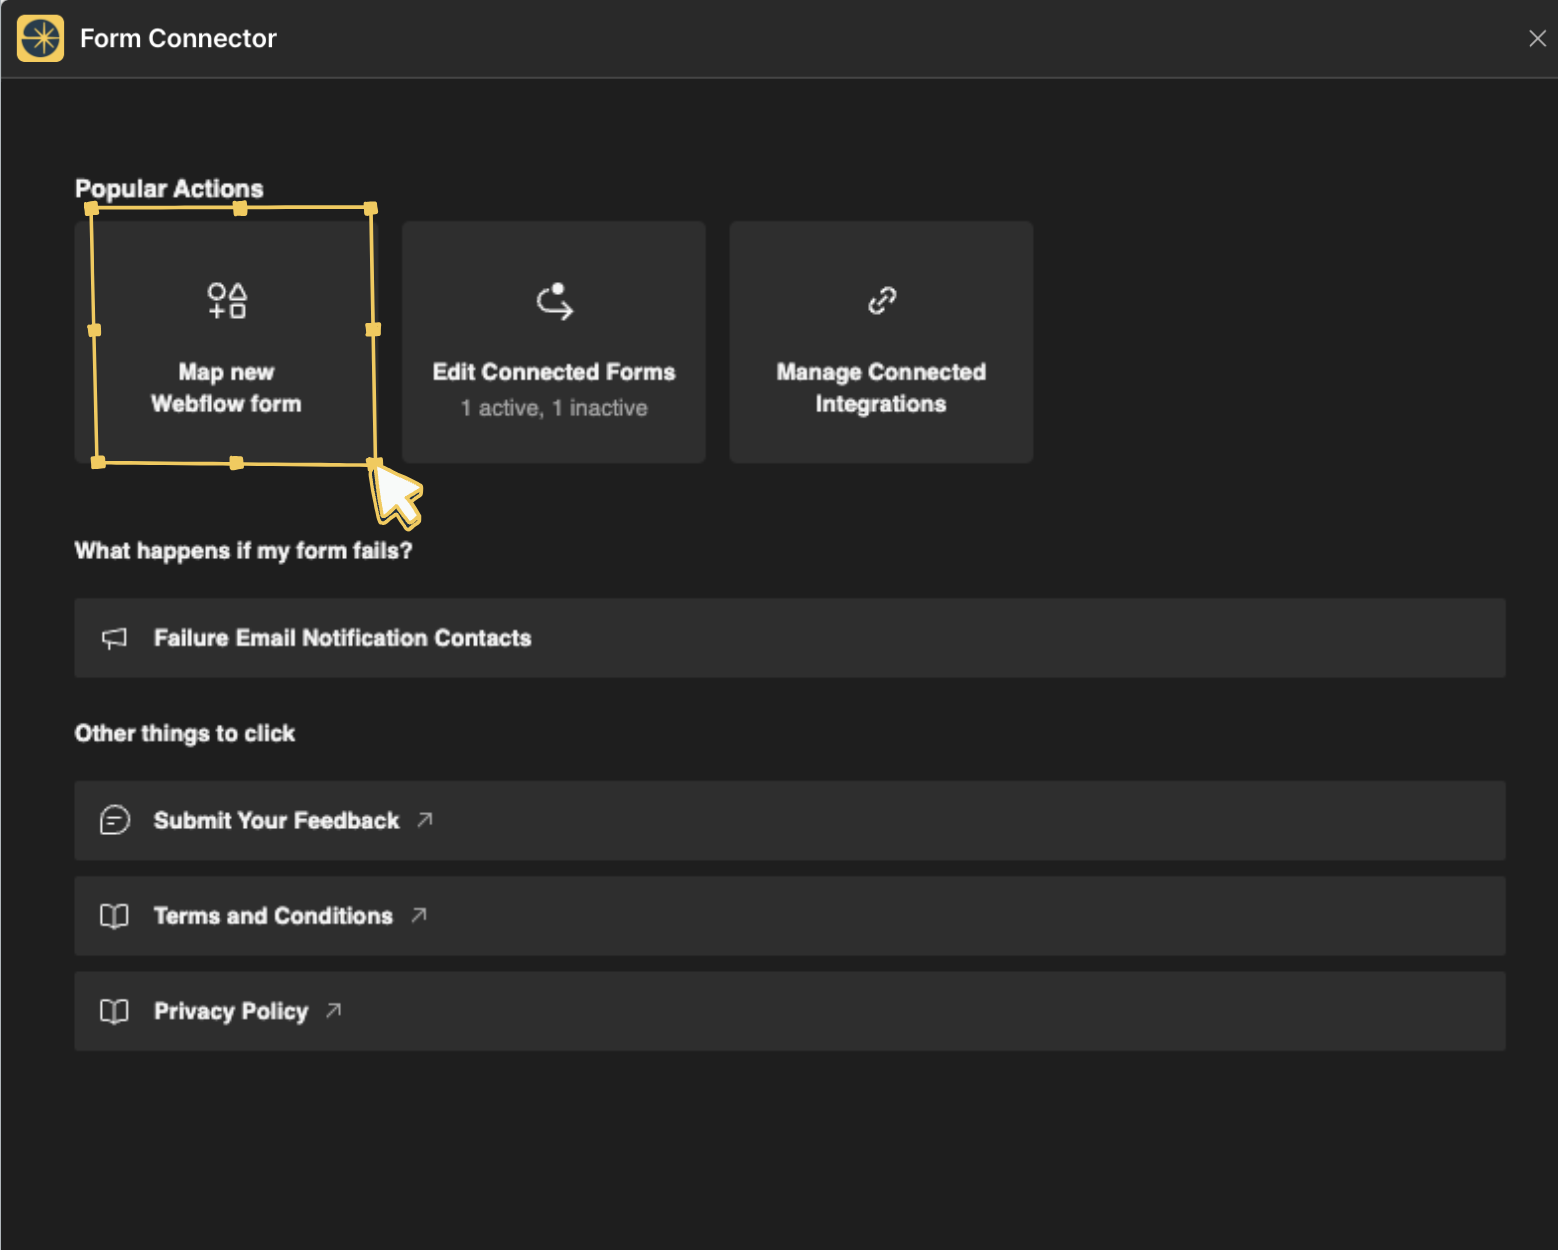
Navigate to Map New Webflow Form:
- From the home menu, click on "Map new Webflow form."
- You will see a screen displaying a dropdown menu to choose the page that contains your form.
-
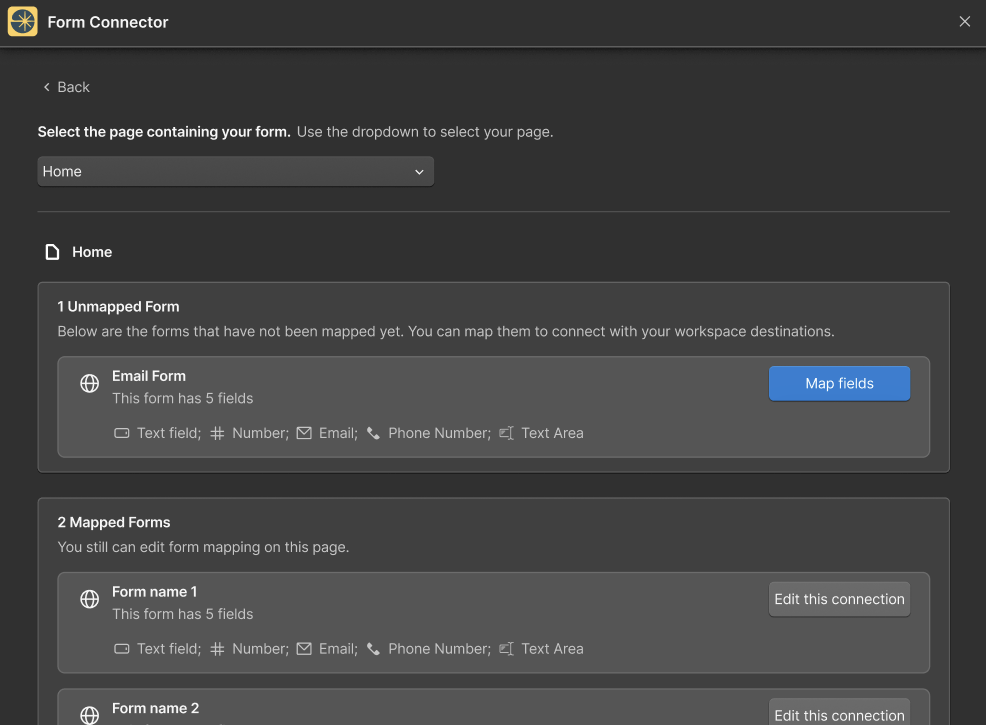
Select the Page:
- Use the dropdown menu to select the page where your form is located..
- Choose Your Form:
- The screen will show from the page you selected both mapped and unmapped forms with their fields.
- Click
Map Fieldsfor unmapped forms orEdit this connectionfor already mapped forms.
Step 2: Edit connections
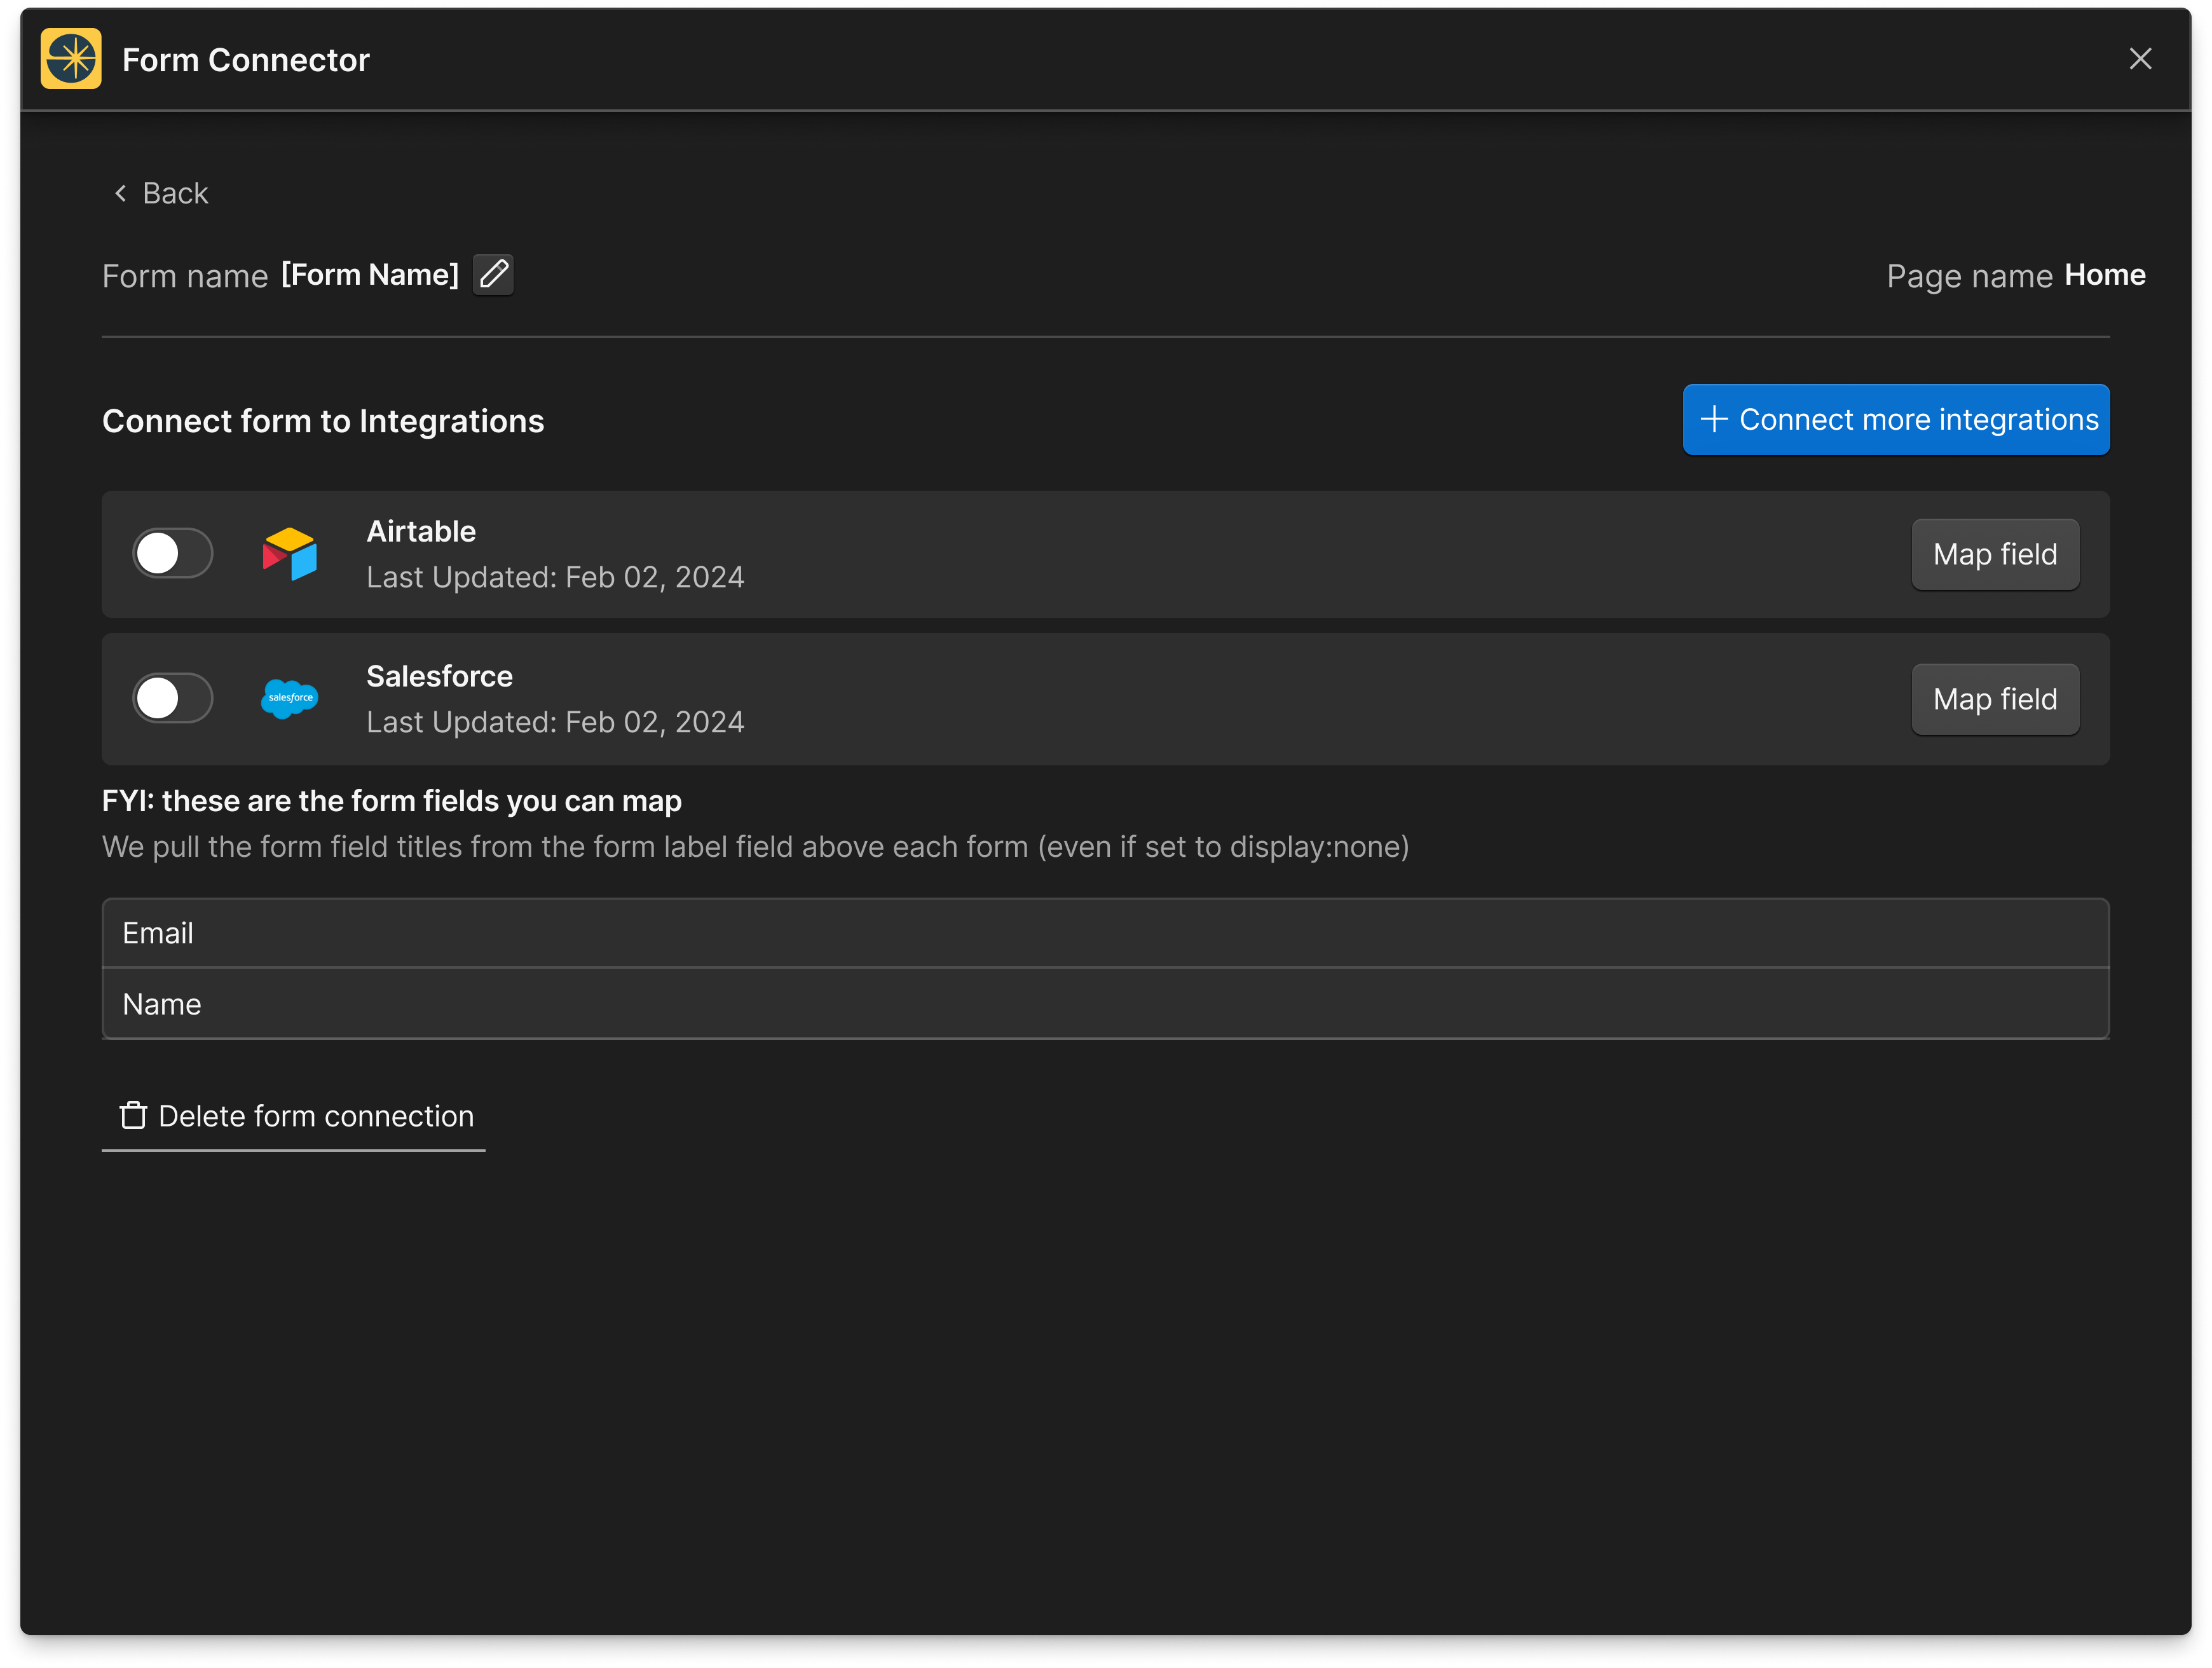
- You can toggle Connector Status to enable or disable connections from this form to the list of destinations you have integrated.
- You can
connect more integrations, view the fields you can map, delete the form connection, andMap fields.
Step 4: Mapping Fields to Destinations
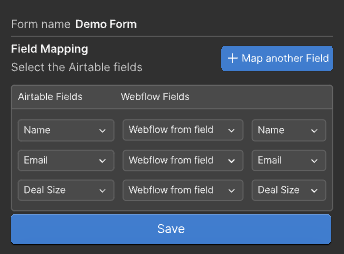
- Map the Fields:
- The mapping screen will display dropdowns for fields depending on your destination. Make sure you select a Base and a Table for Airtable, or the Object for Salesforce before mapping all objects
- Left Column: Lists the fields from your destination workspace.
- Middle Column: Allows you change from webflow Form Fields to a custom default value. You can set default number and text values.
Note: When setting default values, make sure you click the blue check to the right to set it before hitting the Save button.

- Right Column: Lists the Webflow form fields you are connecting (e.g., Name, Email).
- You can add fields by clicking Map another field or delete fields as needed.
Step 5: saving your connection
- Once you have mapped all the necessary fields, you can toggle the Connector Status, leaving it Enabled or Disabled. Connector Status allows you to save form connections as draft.
- Click "Save" to finalize the connection.
- A success notification will confirm that your form edits have been saved as a draft or enabled, depending the Connector Status.
- Congrats! You will now be redirected to Form Connector App Home Menu :)
By following these steps, you can now map new Webflow forms to your software destinations using Form Connector App.
Thank you for reading! If you have any questions or need further assistance, feel free to reach out through our support channels. Happy form mapping!