Mapping fields in Form Connector App to Notion is a straightforward process that ensures your form submissions are accurately captured and stored in Notion Databases. This guide will walk you through the necessary steps to configure the mapping correctly.
Step-by-Step Guide
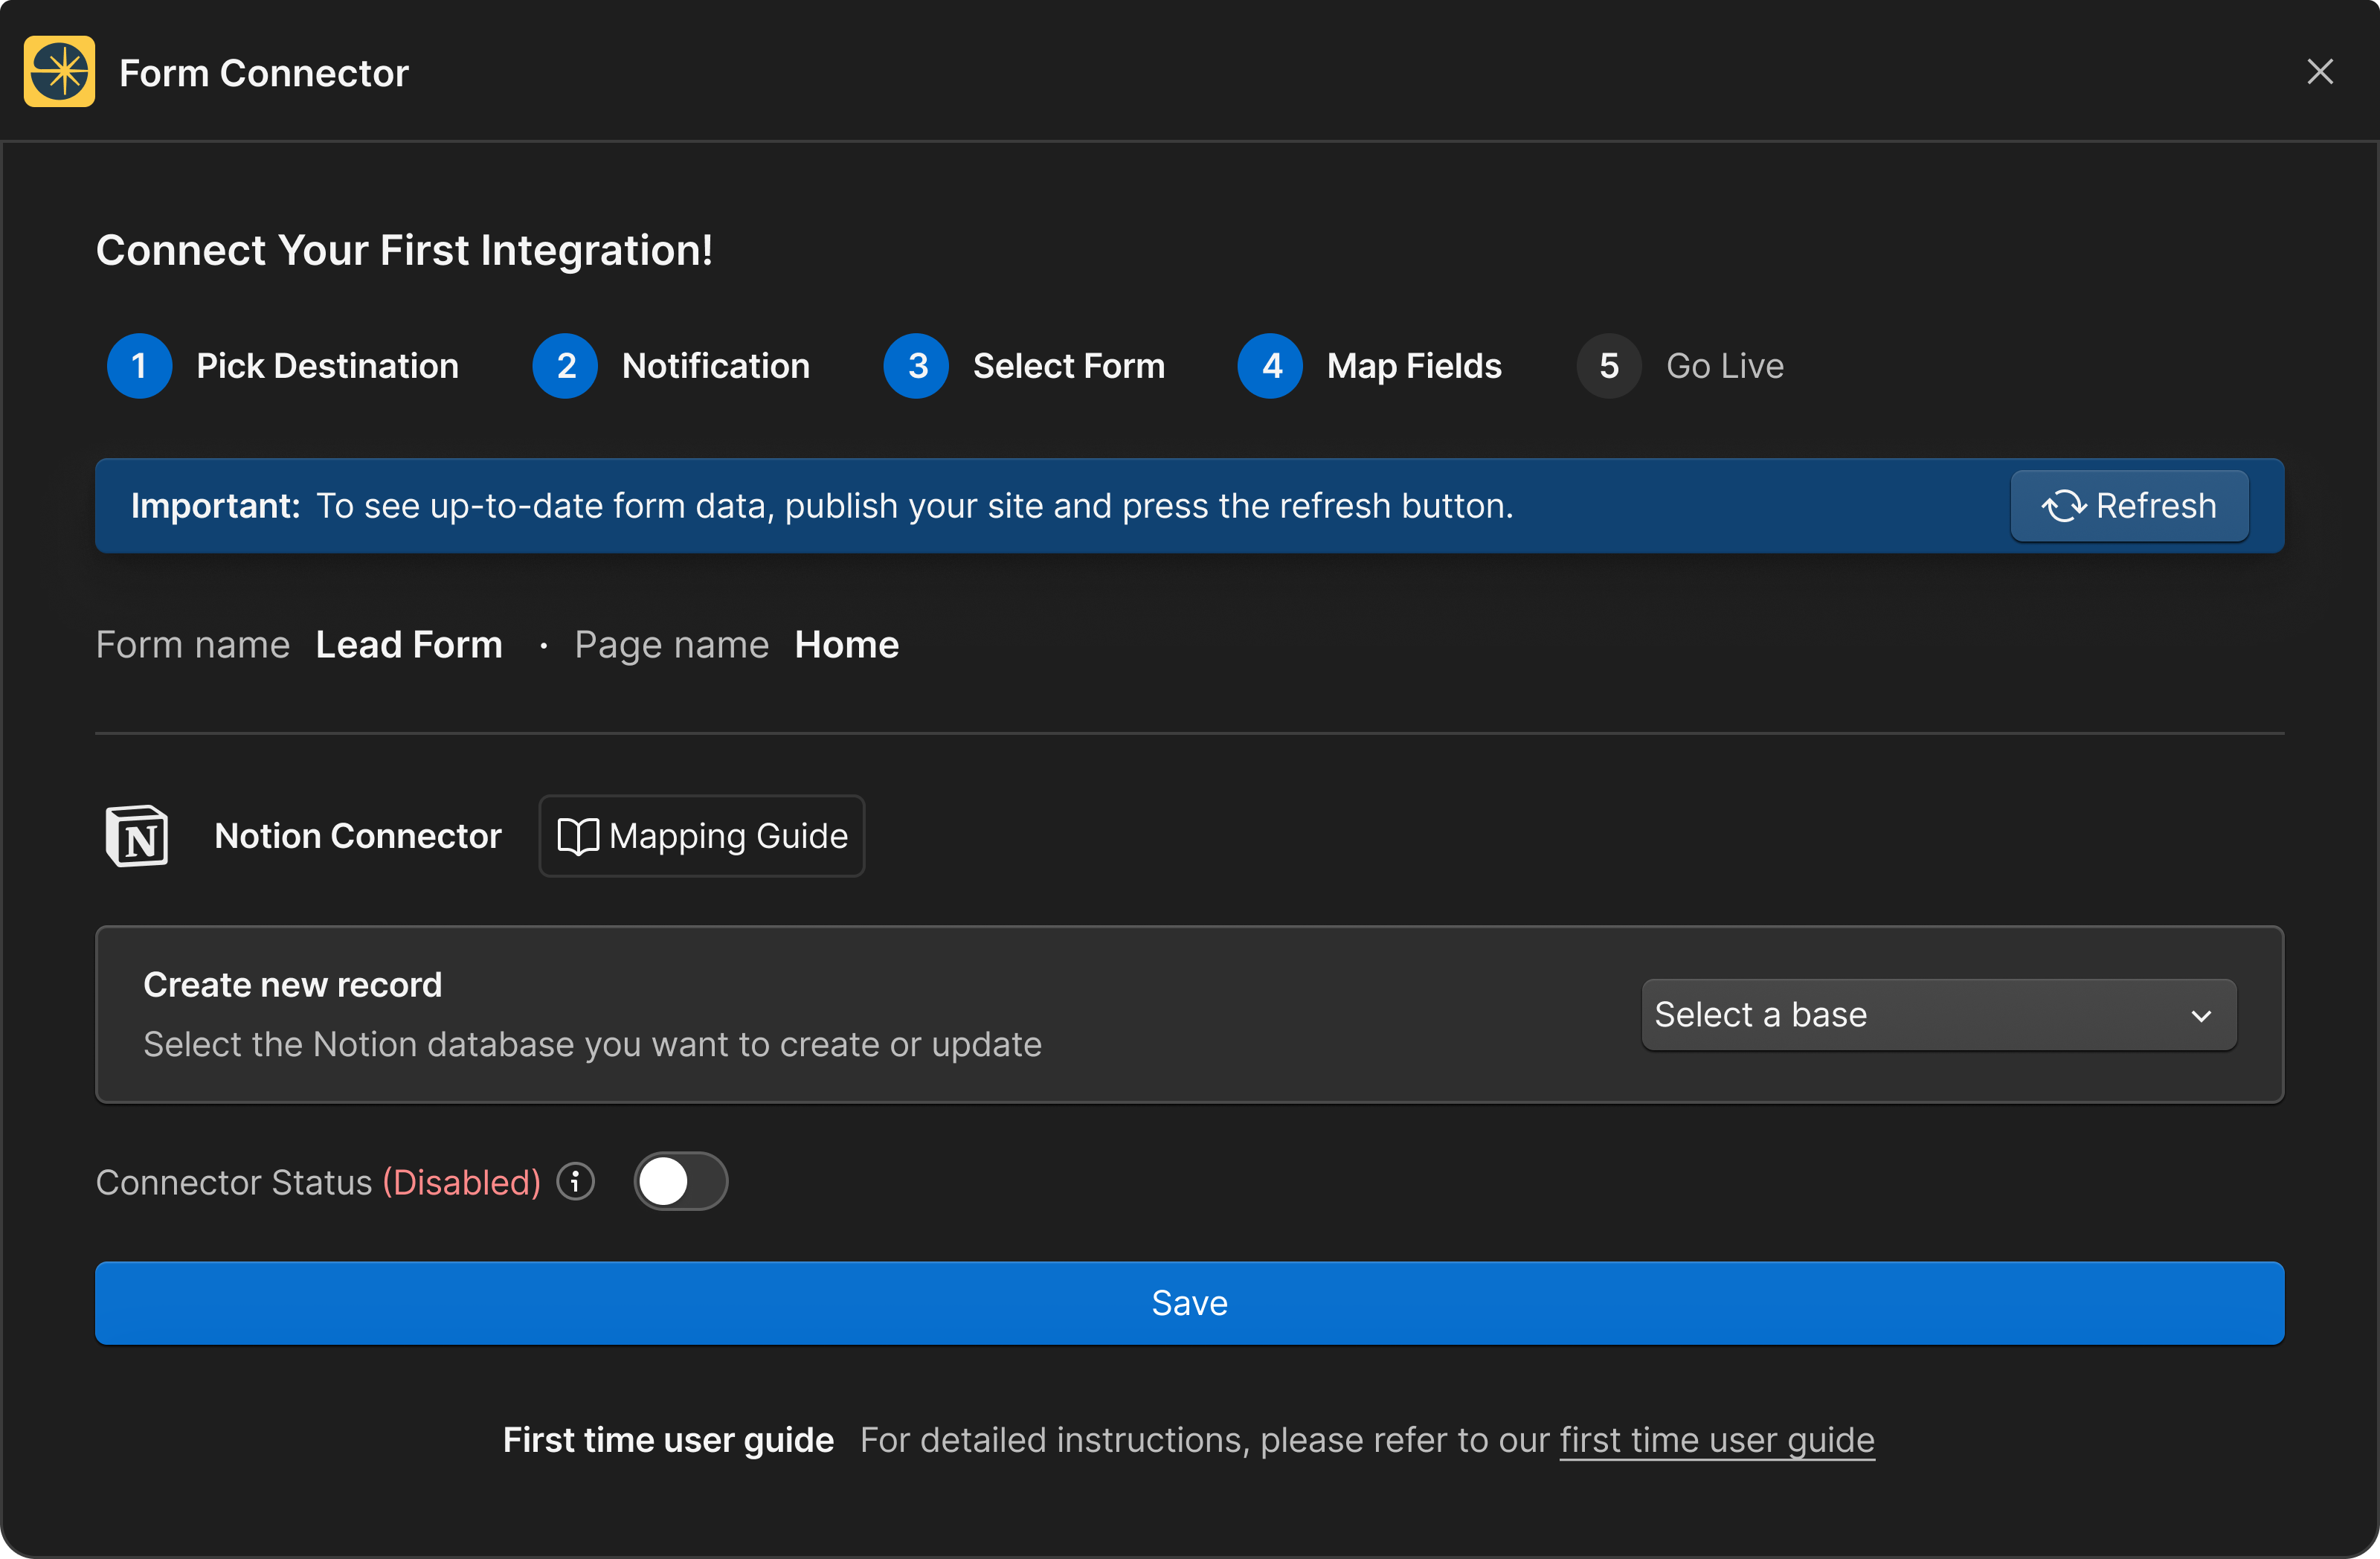
1. Select a Notion Database:
- Start by selecting the Notion Database you want to create or update from the dropdown. Dropdown will present all your Notion Databases.
- Click the "
Refresh" button on the blue banner if you do any modifications on Notion while mapping fields. Refresh allows to present up to date information from your selected destination.
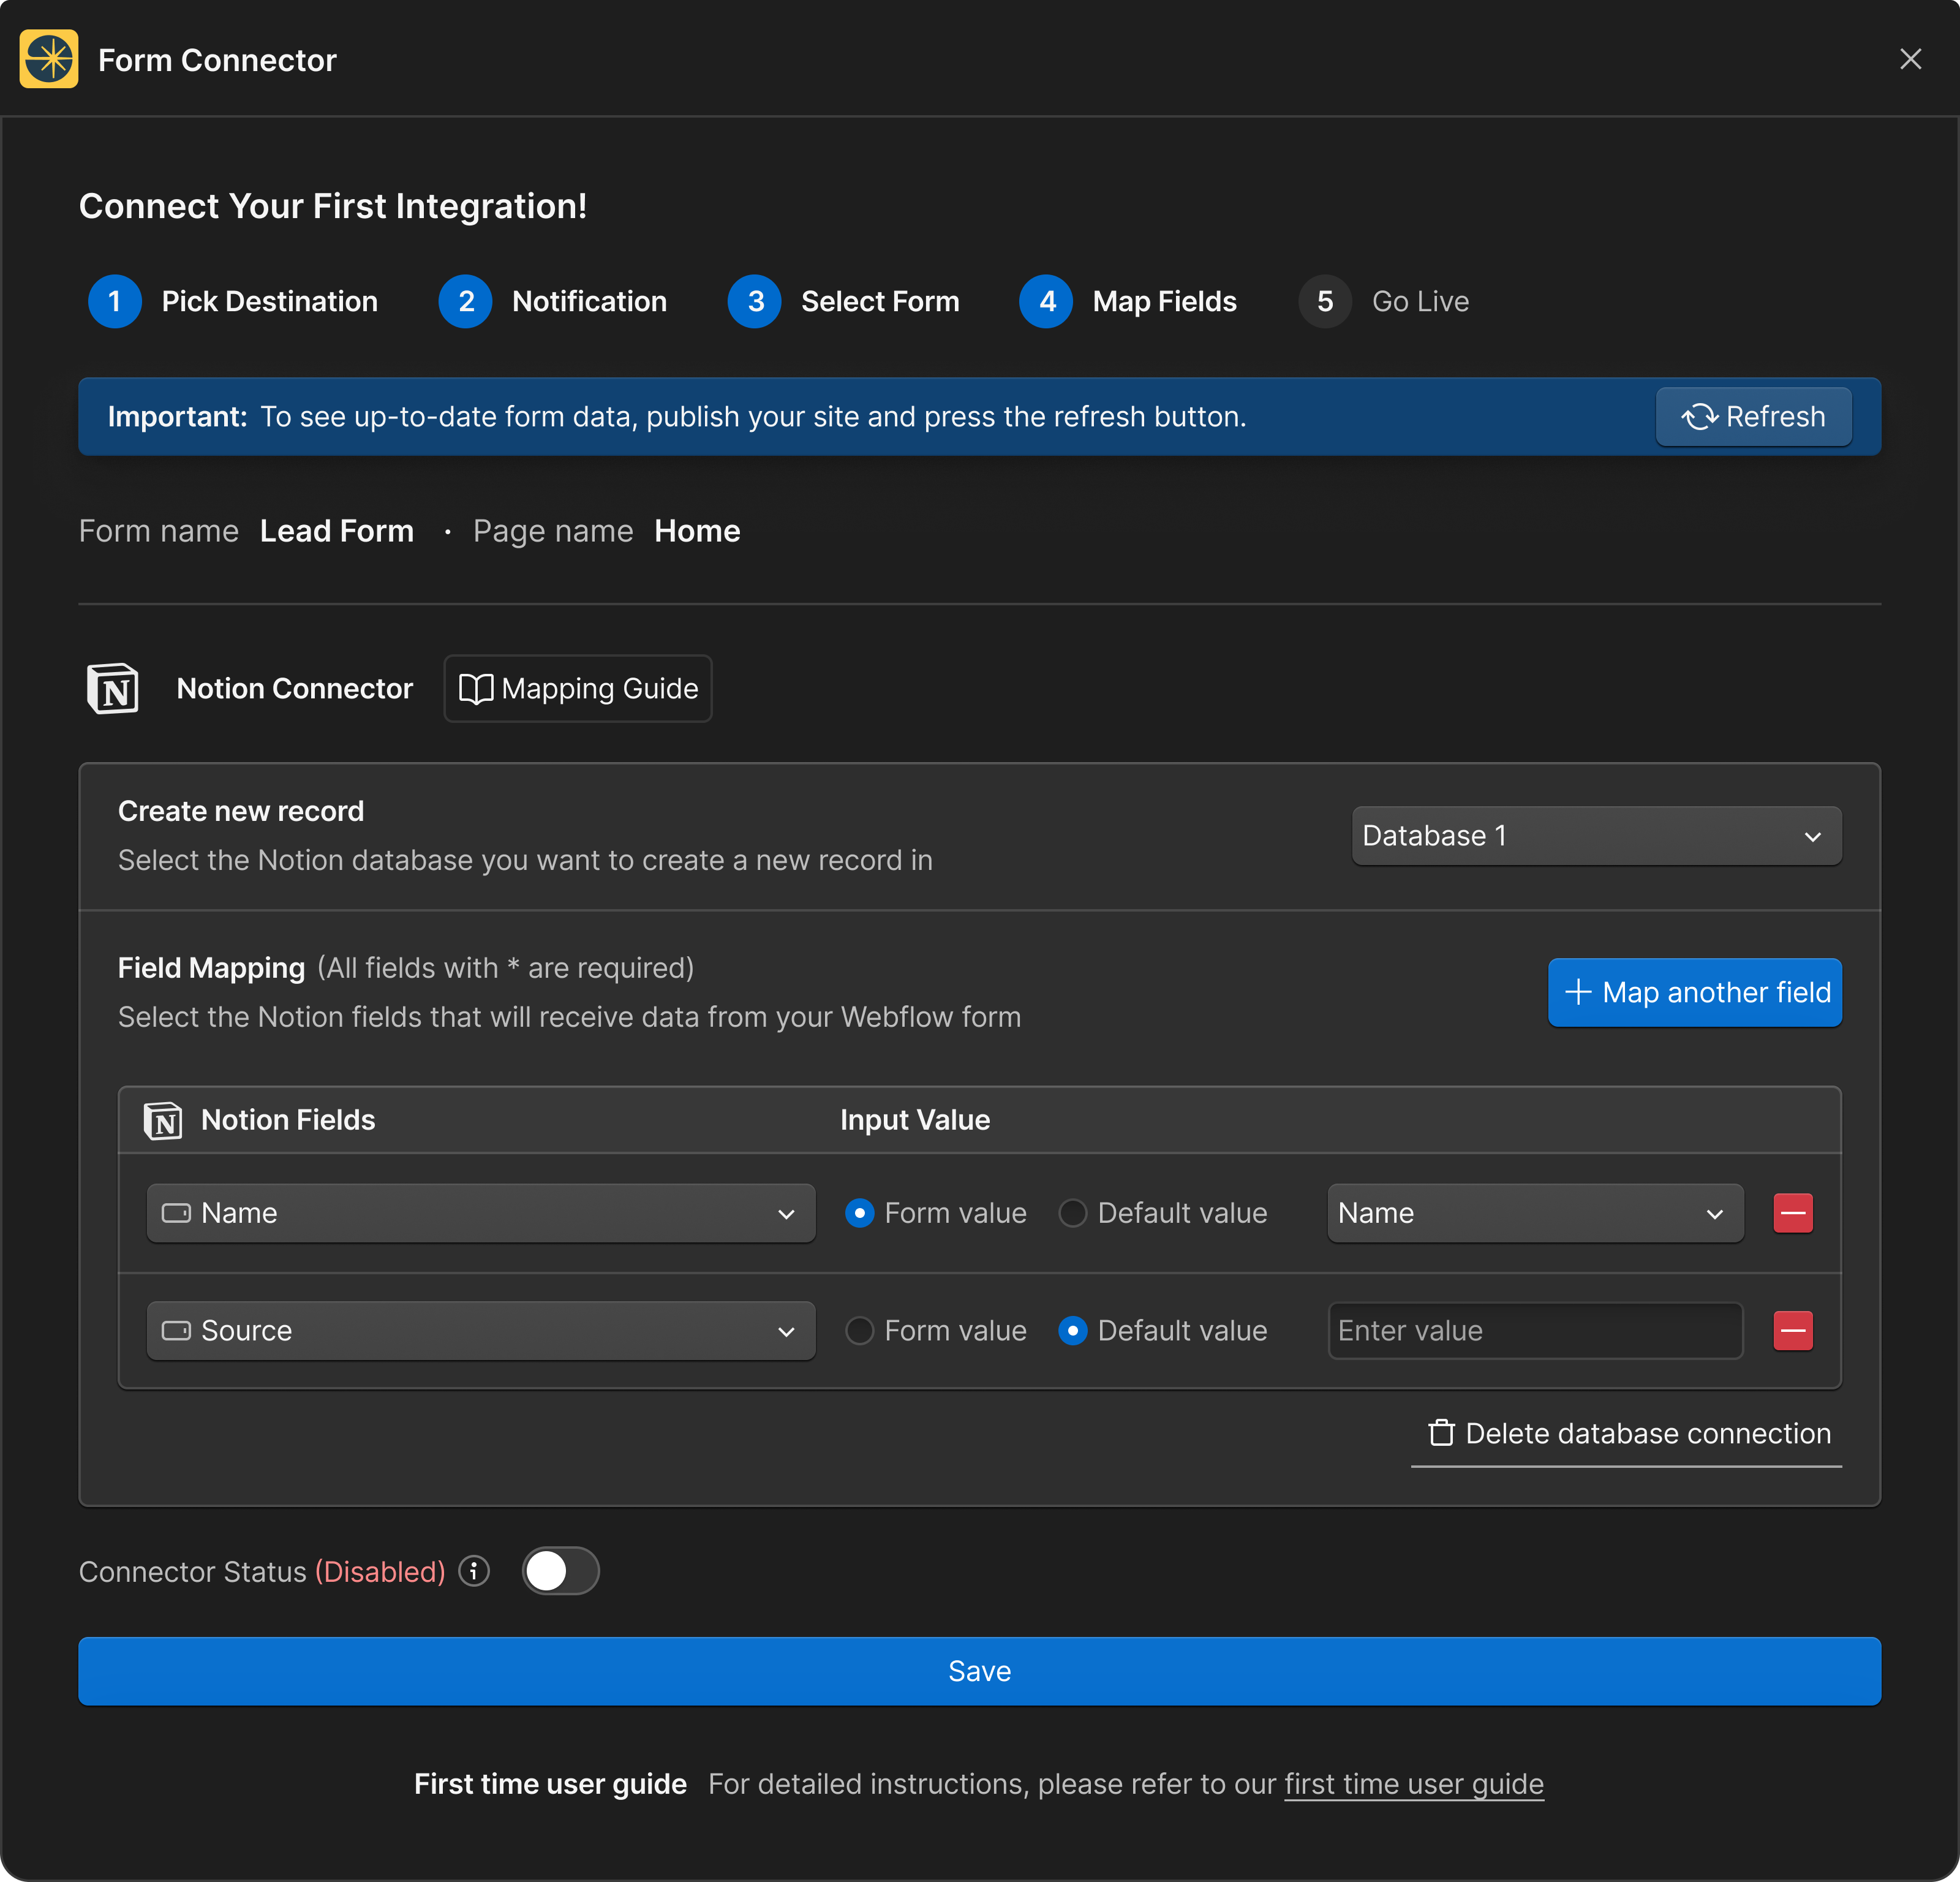
2. Map Notion and Webflow Form Fields:
- In the Field Mapping section, you’ll see a list of all Notion fields that can be mapped to Webflow form fields.
- For each Notion field, select the corresponding value. You can select a field from your Webflow form, or set a default number or text value. If you want to learn more check our Map New Form Guide.
- Ensure all fields are mapped correctly. If not, you will see a red error message indicating that some fields are not properly mapped.
.png)
3. Connector Status:
- Toggle the Connector Status to enable or disable the connection. Make sure to enable it once all fields are mapped correctly.
4. Save Configuration:
- Once you have mapped all necessary fields and enabled the connector, click "Save" to apply your settings.
Key Points to Remember
- Database Selection: It is crucial to select the correct Notion Database before mapping fields.
- Field Mapping: Proper mapping ensures data integrity and accurate data transfer from Webflow forms to Notion.
Troubleshooting Tips
- If you encounter issues with field mapping, ensure that all required fields are mapped.
- Verify that the connector status is enabled to allow data transfer.
By following these steps, you can efficiently map your Webflow form fields to Notion, ensuring seamless data integration and enhancing your workflow.
For more detailed guides and assistance, check out our related articles: