Welcome to Form Connector App! This guide will walk you through the first essential steps to set up the app for the first time.
Make sure you have already given permissions to Form Connector App, for more information here are some articles than can help you out:
- Logging in, setting your Webflow project, and launching Form Connector
- Authorizing Form Connector App
Now, let's get started!
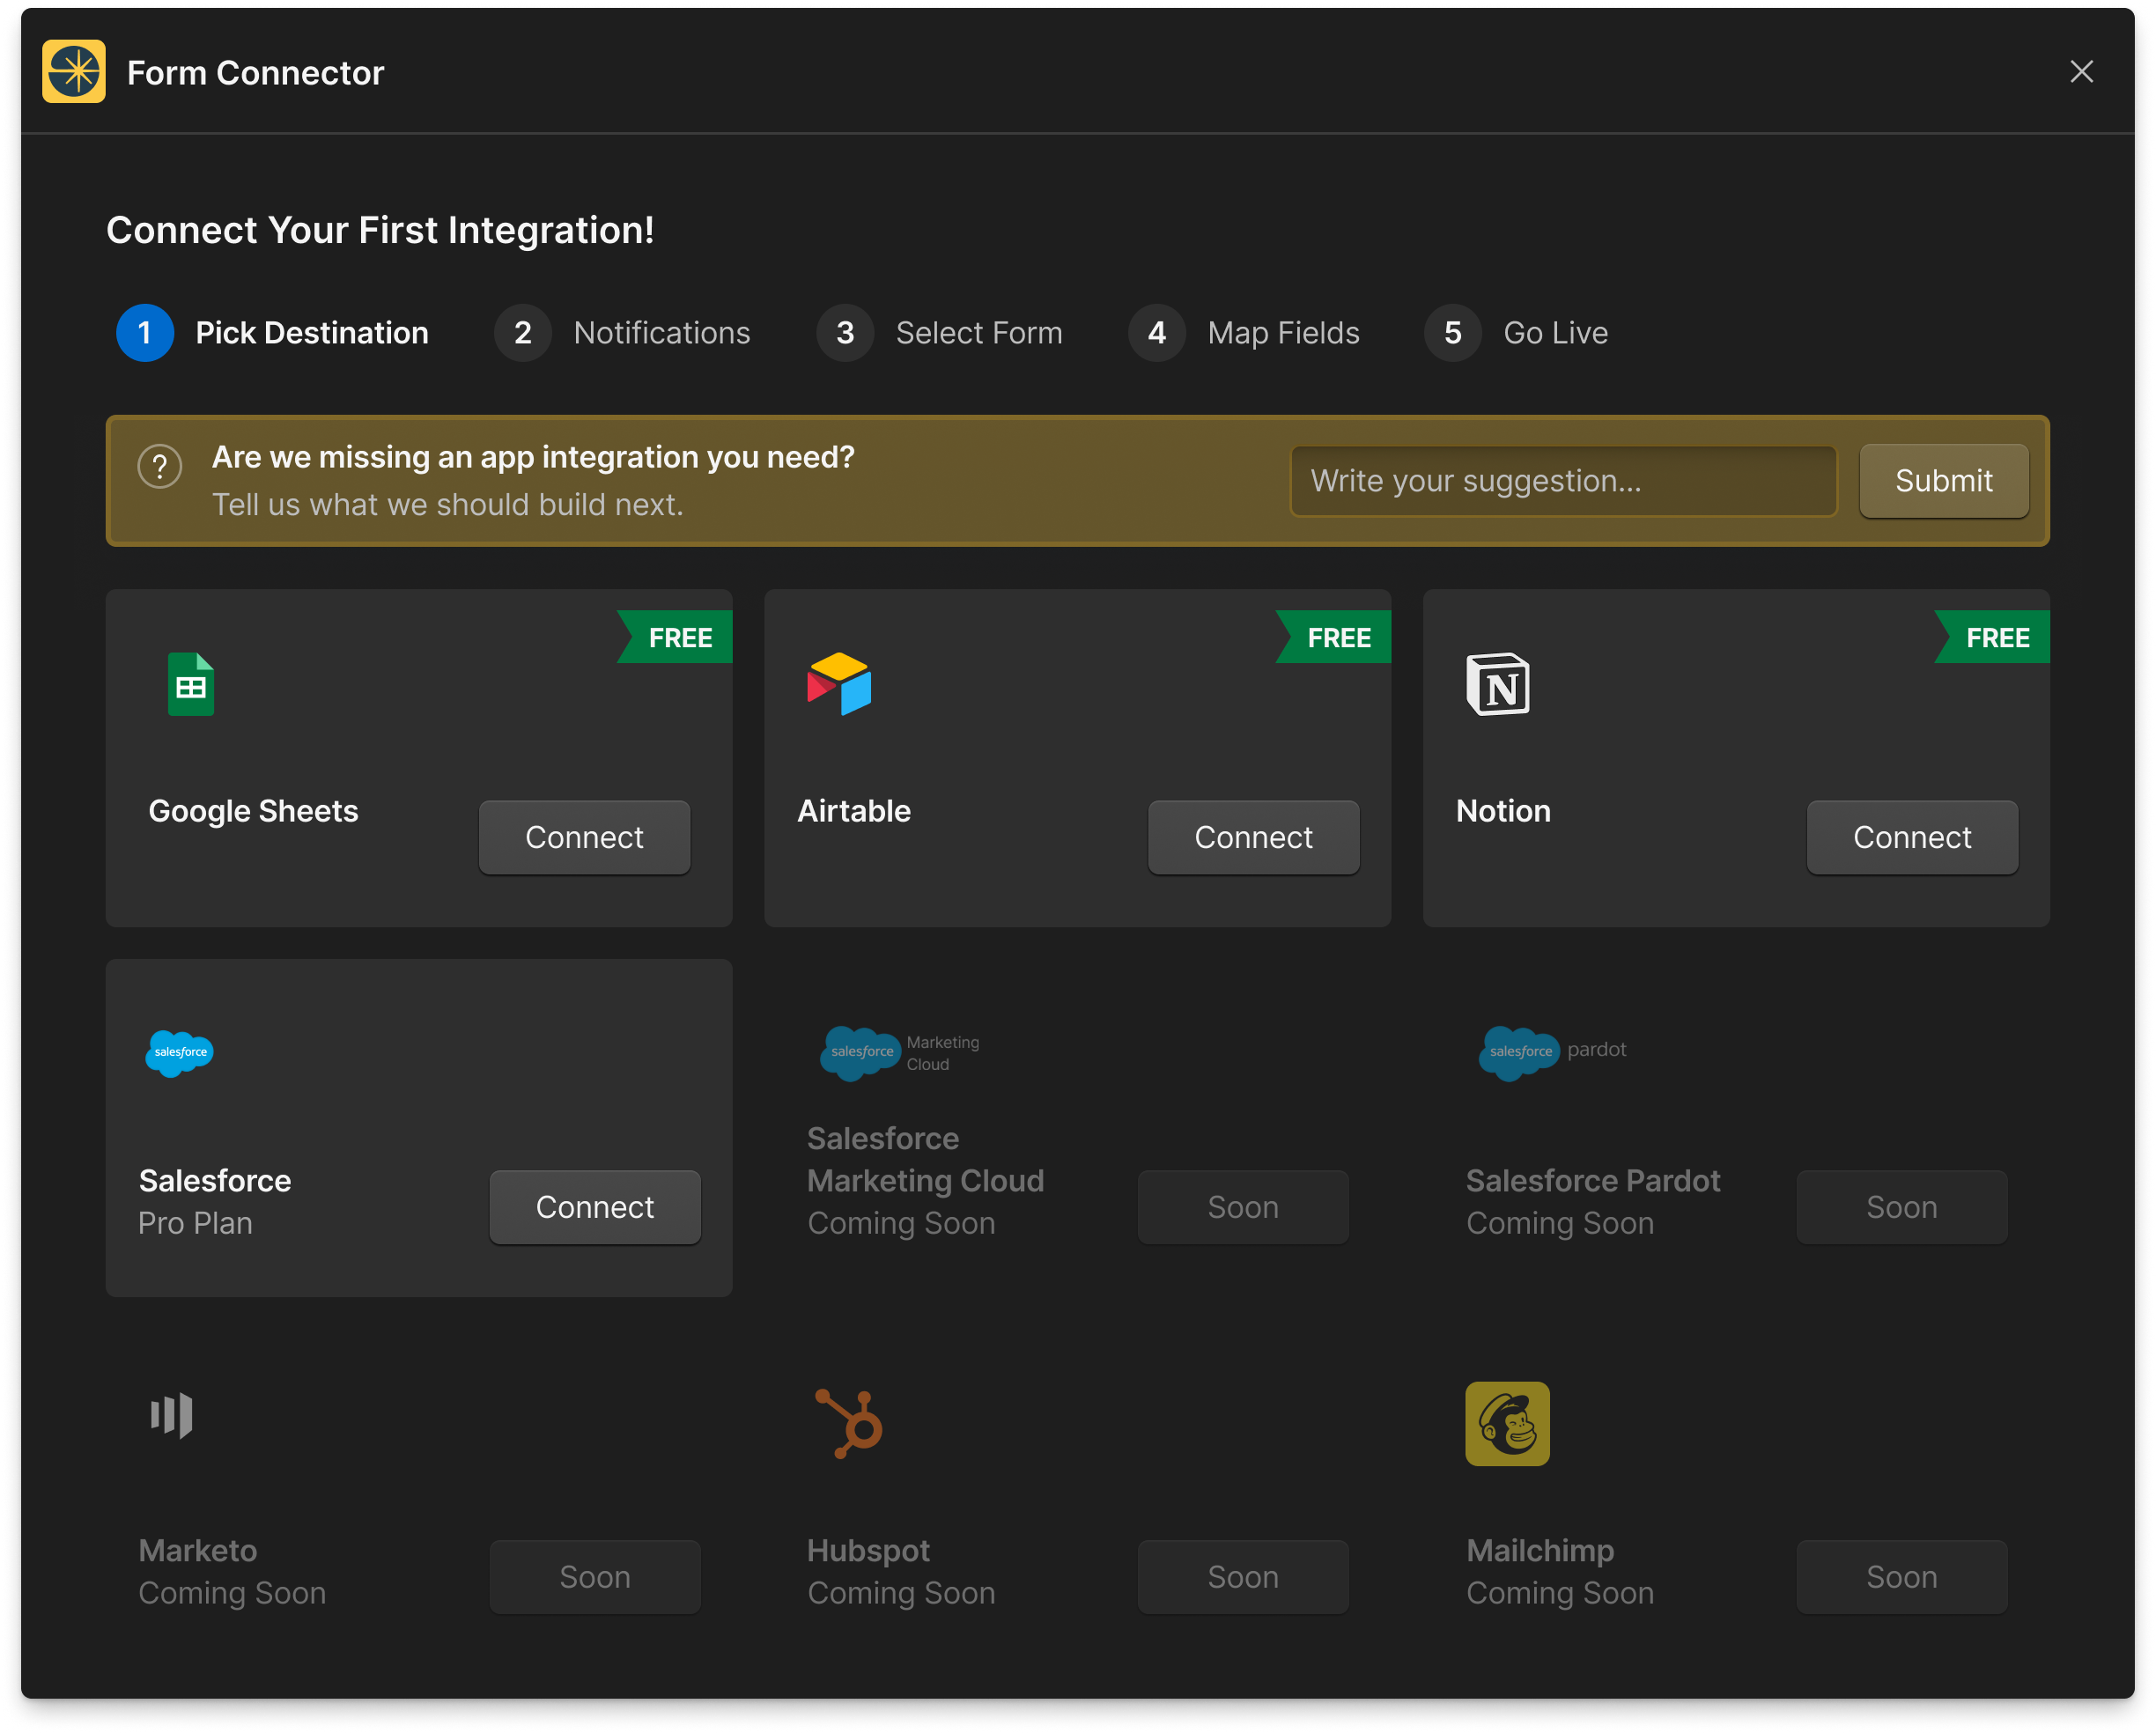
STEP 1: SET A SOFTWARE DESTINATION
-
Choose your First Integration:
Pick from Free Connectors like Google Sheets, Airtable, and Notion, or explore Pro Connectors such as Salesforce
You can also suggest new integrations using the yellow feedback banner inside the app.
Step 2: set up onboarding and notifications settings
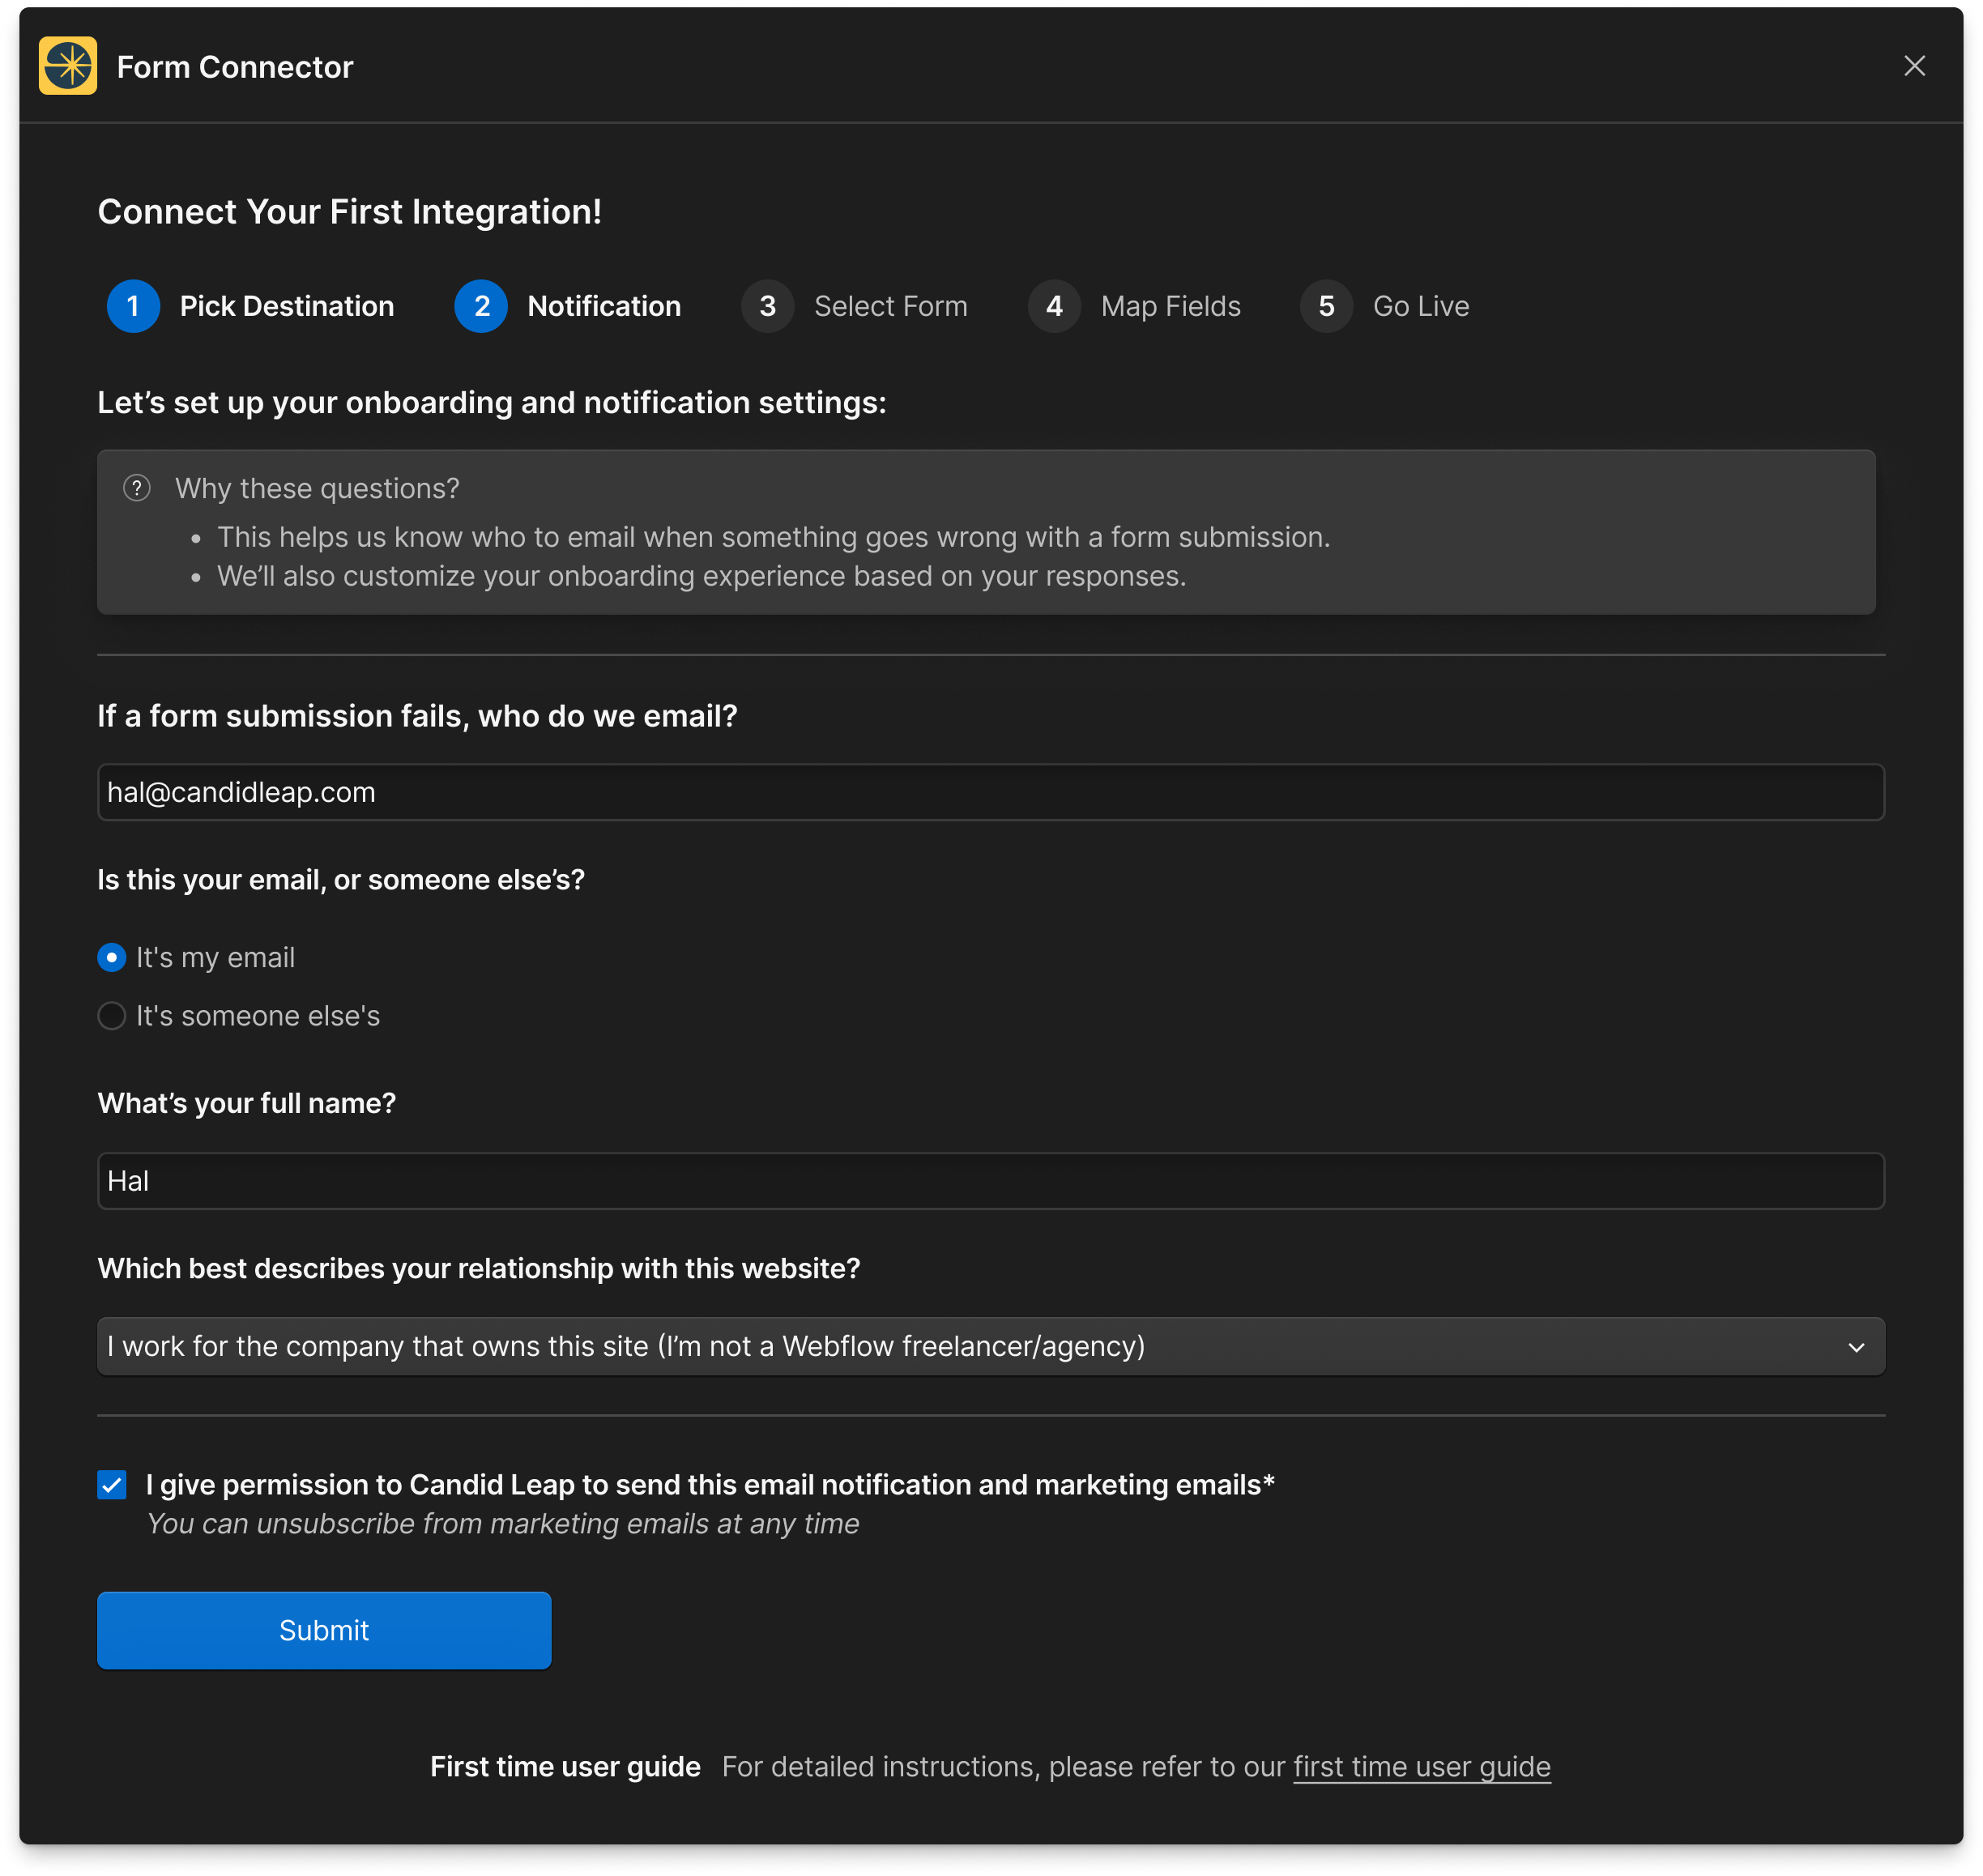
Simply fill out the fields, make sure you check the box to give us permissions to send notifications, and hit Submit to move on to the next step!
Step 3: Select the form you wish to connect
.png)
Use the dropdown to select the page containing the form you want to map.
- Differentiate between component-based forms and static forms for seamless mapping.
- After selecting your form, click
Map this formto continue.
Step 4: Map Fields to destinations
-
Map Fields:
Select the fields from your Webflow form and map them to the appropriate fields in your destination software. You can add or remove fields as necessary. Learn more about mapping fields on our Map a new Form Guide.- You selected Airtable as a destination? Check out our detailed mapping guide for Airtable here.
- You selected Salesforce as a destination? Check out our detailed mapping guide for Salesforce here.
- You selected Notion as a destination? Check out our detailed mapping guide for Notion here.
- You selected Google Sheets as a destination? Check out our detailed mapping guide for Google Sheets here.
- Toggle Connector Status: Connector Status allows you to choose if your connection will be live and active, or saved as a draft. In your home menu you can see how many active and inactive forms you have. Learn more on editing connected forms
- Save and Go Live:
Once you have mapped all necessary fields, click "Save." You will receive a success notification confirming that the connection is live if you toggle the connector status active. If you disable the connector status, a message will be presented confirming you successfully saved a Draft. Connector Status let you choose if your connection will be live and active, or saved as a draft.
Thank you for taking the time to read our First-Time User Setup Guide for Form Connector App. For more detailed instructions, refer to our Navigating the Home Menu options guide.
We hope this guide has been helpful and that you enjoy using Form Connector App to simplify your Webflow form integrations. Happy form building!